Local state management
We’ve learned how to manage remote data from our GraphQL server with Apollo Client, but what should we do with our local data? We want to be able to access boolean flags and device API results from multiple components in our app, but don’t want to maintain a separate Redux or MobX store. Ideally, we would like the Apollo cache to be the single source of truth for all data in our client application.
That’s where apollo-link-state, our solution for managing local data in Apollo Client, comes in. apollo-link-state allows you to store your local data inside the Apollo cache alongside your remote data. To access your local data, just query it with GraphQL. You can even request local and server data within the same query!
In this section, you’ll learn how to simplify local state management in your app with apollo-link-state. We’ll build client-side resolvers to help us execute local queries and mutations. You’ll also learn how to query and update the cache with the @client directive. Let’s jump right in!
Setting up
apollo-link-state is already included in Apollo Boost, so you don’t have to install it. It’s configurable on the clientState property on the Apollo Boost constructor:
import ApolloClient from "apollo-boost";
import { defaults, resolvers } from "./resolvers";

const client = new ApolloClient({
  uri: `https://nx9zvp49q7.lp.gql.zone/graphql`,
  clientState: {
    defaults,
    resolvers,
    typeDefs
  }
});
The three options you can pass to clientState are:
defaults: Object- The initial data you want to write to the Apollo cache when the client is initialized
resolvers: Object- A map of functions that your GraphQL queries and mutations call in order to read and write to the cache
typeDefs: string | Array<string>- A string representing your client-side schema written in Schema Definition Language. This schema is not used for validation (yet!), but is used for introspection in Apollo DevTools
None of these options are required. If you don’t specify anything, you will still be able to use the @client directive to query the cache.
If you’d like a deep dive into the clientState config properties, we recommend checking out the apollo-link-state docs. Otherwise, get ready to learn about these properties gradually as we build Query and Mutation components for local data.
If you’d like to follow along, please open our example app on CodeSandbox. Since this example lives in the
apollo-link-staterepository, it does not use Apollo Boost for setup.
Updating local data
There are two ways to perform mutations in apollo-link-state. The first way is directly writing to the cache by calling cache.writeData within an ApolloConsumer or Query component. Direct writes are great for one-off mutations that don’t depend on the data that’s currently in the cache, such as writing a single value. The second way is creating a Mutation component with a GraphQL mutation that calls a client-side resolver. We recommend using resolvers if your mutation depends on existing values in the cache, such as adding an item to a list or toggling a boolean. You can think of direct writes like calling setState, whereas resolvers offer a bit more structure like Redux. Let’s learn about both ways below!
Direct writes
Direct writes to the cache do not require a GraphQL mutation or a resolver function. They access your Apollo Client instance directly by accessing the client property within the render prop function of the ApolloConsumer or Query components. We recommend using this strategy for simple writes, such as writing a string, or one-off writes. It’s important to note that direct writes are not implemented as GraphQL mutations under the hood, so you shouldn’t include them in your schema. They also do not validate that the data you’re writing to the cache is in the shape of valid GraphQL data. If either of these features are important to you, you should opt for a resolver instead.
Here’s what a direct write looks like in our todo app with the ApolloConsumer component:
import React from 'react';
import { ApolloConsumer } from 'react-apollo';

import Link from './Link';

const FilterLink = ({ filter, children }) => (
  <ApolloConsumer>
    {client => (
      <Link
        onClick={() => client.writeData({ data: { visibilityFilter: filter } })}
      >
        {children}
      </Link>
    )}
  </ApolloConsumer>
);
The ApolloConsumer render prop function is called with a single value, the Apollo Client instance. You can think of the ApolloConsumer component as similar to the Consumer component from the new React context API. From the client instance, you can directly call client.writeData and pass in the data you’d like to write to the cache.
What if we want to immediately subscribe to the data we just wrote to the cache? Let’s create an active property on the link that marks the link’s filter as active if it’s the same as the current visibilityFilter in the cache. To immediately subscribe to a client-side mutation, wrap it in a Query component instead of an ApolloConsumer component. The Query component also has the client instance exposed on its render prop function.
import React from 'react';
import { Query } from 'react-apollo';
import gql from 'graphql-tag';

import Link from './Link';

const GET_VISIBILITY_FILTER = gql`
  {
    visibilityFilter @client
  }
`;

// Remember to set an initial value for visibilityFilter with defaults
const FilterLink = ({ filter, children }) => (
  <Query query={GET_VISIBILITY_FILTER}>
    {({ data, client }) => (
      <Link
        onClick={() => client.writeData({ data: { visibilityFilter: filter } })}
        active={data.visibilityFilter === filter}
      >
        {children}
      </Link>
    )}
  </Query>
);
You’ll notice in our query that we have an @client directive next to our visibilityFilter field. This tells Apollo Client’s network stack to fetch the query from the cache instead of sending it to our GraphQL server. Once you call client.writeData, the query result on the render prop function will automatically update. All cache writes and reads are synchronous, so you don’t have to worry about loading state.
Resolvers
If you’d like to implement your local state update as a GraphQL mutation, then you’ll need to specify a function in your resolver map. The resolver map is an object with resolver functions for each GraphQL object type. You can think of a GraphQL query or mutation as a tree of function calls for each field. These function calls resolve to data or another function call.
The signature of a resolver function is the exact same as resolver functions on the server built with graphql-tools. Let’s quickly recap the four parameters of a resolver function:
fieldName: (obj, args, context, info) => result;
obj: The object containing the result returned from the resolver on the parent field or theROOT_QUERYobject in the case of a top-level query or mutation. Don’t worry about this one too much forapollo-link-state.args: An object containing all of the arguments passed into the field. For example, if you called a mutation withupdateNetworkStatus(isConnected: true), theargsobject would be{ isConnected: true }.context: The context object, which is shared between your React components and your Apollo Client network stack. The most important thing to note here is that we’ve added the Apollo cache to the context for you, so you can manipulate the cache withreadQuery,writeQuery,readFragment,writeFragment, andwriteData. Learn more about those methods here.info: Information about the execution state of the query. You will probably never have to use this one.
Let’s take a look at an example of a resolver where we toggle a todo’s completed status:
export const resolvers = {
  Mutation: {
    toggleTodo: (_, variables, { cache, getCacheKey }) => {
      const id = getCacheKey({ __typename: 'TodoItem', id: variables.id })
      const fragment = gql`
        fragment completeTodo on TodoItem {
          completed
        }
      `;
      const todo = cache.readFragment({ fragment, id });
      const data = { ...todo, completed: !todo.completed };
      cache.writeData({ id, data });
      return null;
    },
  },
};
In order to toggle the todo’s completed status, we first need to query the cache to find out what the todo’s current completed status is. We do this by reading a fragment from the cache with cache.readFragment. This function takes a fragment and an id, which corresponds to the todo item’s cache key. We get the cache key by calling the getCacheKey that’s on the context and passing in the item’s __typename and id.
Once we read the fragment, we toggle the todo’s completed status and write the updated data back to the cache. Since we don’t plan on using the mutation’s return result in our UI, we return null since all GraphQL types are nullable by default.
Let’s learn how to trigger our toggleTodo mutation from our component:
import React from 'react';
import { Mutation } from 'react-apollo';
import gql from 'graphql-tag';

const TOGGLE_TODO = gql`
  mutation ToggleTodo($id: Int!) {
    toggleTodo(id: $id) @client
  }
`;

const Todo = ({ id, completed, text }) => (
  <Mutation mutation={TOGGLE_TODO} variables={{ id }}>
    {toggleTodo => (
      <li
        onClick={toggleTodo}
        style={{
          textDecoration: completed ? 'line-through' : 'none',
        }}
      >
        {text}
      </li>
    )}
  </Mutation>
);
First, we create a GraphQL mutation that takes the todo’s id we want to toggle as its only argument. We indicate that this is a local mutation by marking the field with a @client directive. This will tell apollo-link-state to call our toggleTodo mutation resolver in order to resolve the field. Then, we create a Mutation component just as we would for a remote mutation. Finally, pass in your GraphQL mutation to your component and trigger it from within the UI in your render prop function.
If you’d like to see an example of a local mutation adding a todo to a list, check out the TodoForm component in the CodeSandbox.
Querying local data
Querying the Apollo cache is similar to querying your GraphQL server. The only difference is that you add a @client directive on your local fields to indicate they should be resolved from the cache. Let’s look at an example:
import React from 'react';
import { Query } from 'react-apollo';
import gql from 'graphql-tag';

import Todo from './Todo';

const GET_TODOS = gql`
  {
    todos @client {
      id
      completed
      text
    }
    visibilityFilter @client
  }
`;

const TodoList = () => (
  <Query query={GET_TODOS}>
    {({ data: { todos, visibilityFilter } }) => (
      <ul>
        {getVisibleTodos(todos, visibilityFilter).map(todo => (
          <Todo key={todo.id} {...todo} />
        ))}
      </ul>
    )}
  </Query>
);
First, we create our GraphQL query and add @client directives to todos and visibilityFilter. Then, we pass the query to our Query component. Reading from the Apollo cache is synchronous, so you won’t have to worry about tracking loading state.
Since the query runs as soon as the component is mounted, what do we do if there are no todos in the cache? We need to write an initial state to the cache before the query is run to prevent it from erroring out. That’s where defaults come in!
Defaults
Your defaults object represents the initial state that you would like to write to the cache. It’s important to provide defaults for your client-side queries, otherwise they could potentially error out if a mutation hasn’t occurred before they run. The shape of your initial state should match how you plan to query it in your application.
const defaults = {
  todos: [],
  visibilityFilter: 'SHOW_ALL',
};
Your defaults are written to the cache upon initialization of apollo-link-state before any operations have occurred. We also write them to the cache again if you reset the Apollo cache.
Client-side schema
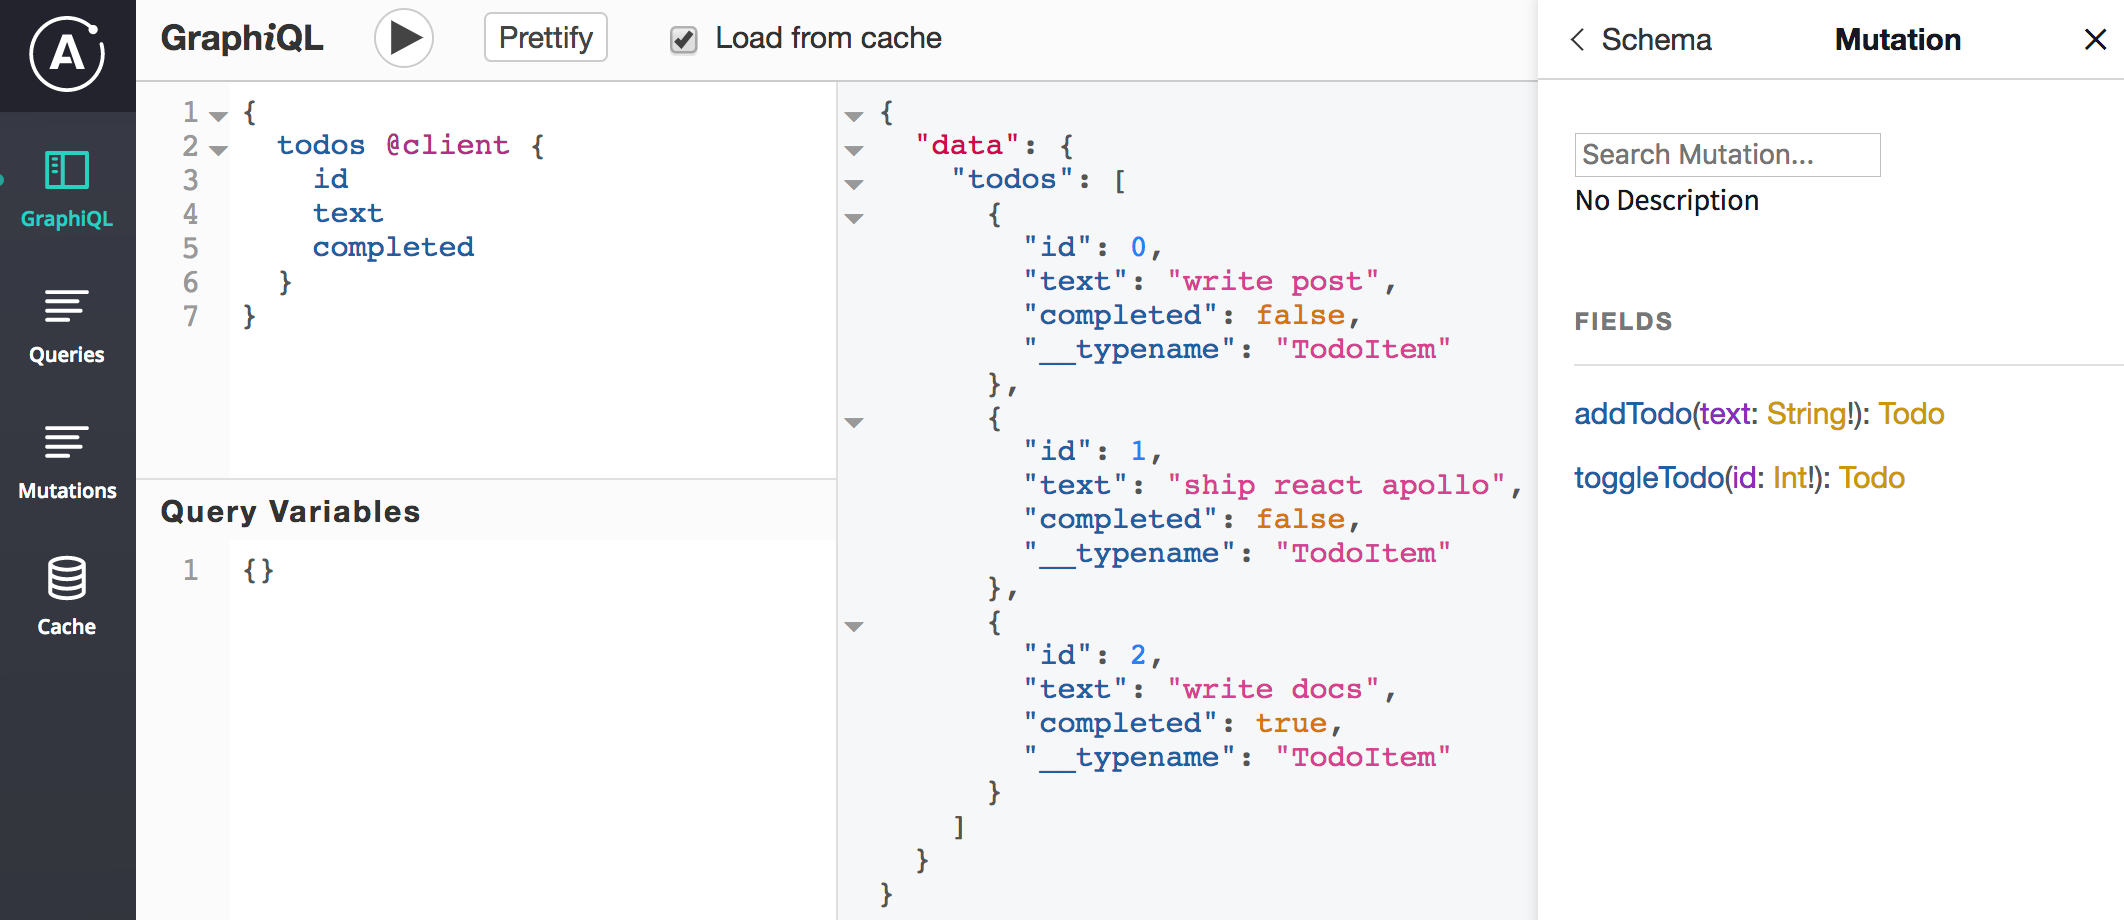
You can optionally pass a client-side schema to the typeDefs config property. This schema is not used for validation like it is on the server because the graphql-js modules for schema validation would dramatically increase your bundle size. Instead, your client-side schema is used for introspection in Apollo DevTools, where you can explore your schema in GraphiQL.
Your schema should be written in Schema Definition Language. Let’s view our schema for our todo app:
const typeDefs = `
  type Todo {
    id: Int!
    text: String!
    completed: Boolean!
  }

  type Mutation {
    addTodo(text: String!): Todo
    toggleTodo(id: Int!): Todo
  }

  type Query {
    visibilityFilter: String
    todos: [Todo]
  }
`;
If you open up Apollo DevTools and click on the GraphiQL tab, you’ll be able to explore your client schema in the “Docs” section. This app doesn’t have a remote schema, but if it did, you would be able to see your local queries and mutations alongside your remote ones. That’s the cool part about apollo-link-state - it enables you to use GraphQL as a single, unified interface for all of your app’s data.
Combining local and remote data
What’s really cool about using a @client directive to specify client-side only fields is that you can actually combine local and remote data in one query. Since we don’t have a remote server, let’s look at an example from Pupstagram where we add a client-only field to our remote data.
First, let’s look at an example of a mixed query. The images field comes from the server. When the array of images comes back, we add a local field isLiked to each image.
const GET_DOG = gql`
  query GetDogByBreed($breed: String!) {
    dog(breed: $breed) {
      images {
        url
        id
        isLiked @client
      }
    }
  }
`;
We need to provide an initial state for isLiked, our client-only field, but where do we put it? We can specify a resolver for Image that will only be called the first time the image comes back from the server.
const resolvers = {
  Image: {
    isLiked: () => false
  }
};
Now that we’ve specified an initial state in the form of a resolver, we can query the data as we normally would. If you would like to toggle the isLiked field, you can create a mutation similar to the toggleTodo mutation we created in a previous example.
const Detail = ({ match: { params: { breed, id } } }) => (
  <View style={styles.container}>
    <Query query={GET_DOG} variables={{ breed }}>
      {({ loading, error, data }) => {
        if (loading) return <Fetching />;
        if (error) return <Error />;

        return (
          <DogList
            data={data.dog.images}
            renderRow={(type, data) => (
              <DogWithLikes
                id={id}
                isLiked={data.isLiked}
                imageId={data.id}
                url={data.url}
              />
            )}
          />
        );
      }}
    </Query>
  </View>
);
Next steps
Managing your local data with Apollo Client can simplify your state management code since the Apollo cache is your single source of truth for all data in your application. If you’d like to learn more about apollo-link-state, check out:
apollo-link-statedocs: Dive deeper into the concepts we just learned, such as resolvers and mixed queries, by taking a look at theapollo-link-statedocs.- The future of state management: Read about our vision for the future of state management with GraphQL in the
apollo-link-stateannouncement post. - Tutorial video by Sara Vieira: Check out this tutorial video by Sara Vieira if you’d like a step-by-step walkthrough on building an app with
apollo-link-state.